Fractal Antennas For Ham Radio

Presented by Jack Hill – W4KH – w4kh@nanniandjack.com

Fractal Geometry is a particularly difficult concept for many people to grasp… Many of you may have heard of “Mandelbrot Sets”, so named for, to quote Wikipedia: “Benoît B. Mandelbrot (20 November 1924 – 14 October 2010) a Polish-born, French and American mathematician, noted for developing a “theory of roughness” in nature and the field of fractal geometry to help prove it, which included coining the word “fractal”. He later discovered the Mandelbrot set of intricate, never-ending fractal shapes, named in his honor.

I invite the reader to “Google” Mandelbrot and become more familiar with his work and how he came to rely on graphic images to foster his understanding of math concepts…

For the really curious, make sure you have a good version of Java (https://www.java.com) and then Google for “online fractal generator” and make your own!

When it comes to Fractal antennas, the field is in its infancy, although cellular telephones have made prolific use of these small, broadband, and efficient antennas. Because of the complexity of building an antenna using repeating patterns whose angles, leg dimensions, and overall pattern must be precisely executed for optimum performance, fractal antennas have not yet made significant inroads into HF operation, especially the lower frequencies (longer wavelengths). That said, one example of a “simple” fractal antenna is the log-periodic, whose elements are scaled from back to front in a manner that allows continuous transmit and receive coverage for a wide slice of spectrum, for example from 7.0 MHz to 30 MHz. Take particular note of the first URL presented, as M0WWA from the UK has designed and built a 28 MHz (ten meter) fractal antenna with pretty good results.

I have put together some URLs that will get your curiosity up and let you explore. Follow other pages in the URLs and links to other pages… if these are not enough, remember Google is your friend!

M0WWA Fractal Antenna Designs

http://www.m0wwa.co.uk/page/M0WWA_fractal_antenna.html

Wikipedia – Fractal Antenna

http://en.wikipedia.org/wiki/Fractal_antenna

Fractal Geometry Panorama

http://classes.yale.edu/fractals/panorama/ManuFractals/FractalAntennas/FractalAntennas.html

Fractal Antennas

http://www.qsl.net/kb7qhc/antenna/fractal/

Fractal Antennas: Hype or Hope?

http://www.kb6nu.com/fractal-antennas-hype-or-hope/

Fractal Antenna for ham radio bands : resource detail

http://www.dxzone.com/dx26559/fractal-antenna-for-ham-radio-bands.html


Ham Radio: Old Technology Gets New Respect

Fox News recently did a feature on Ham Radio, which you can watch here:

http://www.foxnews.com/tech/2014/05/19/ham-radio-old-technology-gets-new-respect/? intcmp=features


Shortwave Radio in WWII

From Scott Gray, KD4VVC:

Click here to see a great documentary on the role of Hallicrafter radios in WWII.


Spy Radio in World War II: “Strategic Service Transmitter-Receiver Number 1” SSTR-1

From Scott Gray, KD4VVC:

Circa 1943. “Office of Strategic Services. Field Photographic Branch… Click here to view Instructional Film: Describes the radio transmitter-receiver unit used during World War II. Explains compactness and ease of concealment, and outlines operations in detail: selection of electrical outlet, battery, or combination of both as power unit; antenna, assembly parts, installation, frequency determination and receiver operation; parts installation, attachment of crystal equipment and transmitter operation.”

Click here for more detailed information on the SSTR-1


The WCARES Vision

From Scott Gray, KD4VVC:

One thing we, as members of WCARES, should always keep in mind….every activity we take part in with WCARES should always have some value in preparing for fulfillment of our mission to provide emergency communication support to our served agencies and communities.  So, when taking part in one of the activities of one of the special interest groups, such as the Technical Subjects group and Skywarn group, always look for how the information and skills shared in these activities prepare you to more effectively fulfill this role.  The same applies to the community service events we assist with, such as the Harpeth River Ride, which gives us an opportunity to set up in field conditions, pass real communications traffic, interface with our served agencies, and give us experience in handling somewhat stressful and confused situations.

As time progresses, I challenge each of you to sharpen your skills and prepare the gear you would use to respond to an event.  As you learn new things that would be valuable for us all to know, please contact the WCARES Emergency Coordinator, so an opportunity can be set up for you to share with as many members as possible.

If you have not done so, please review the Emergency Ops plan that is posted on this website.  It is located in the members area, so if you do not have an account, please take the steps to register.  The plan, is our basis for response to an event, and covers several contingencies, such as repeater outages, etc.


The Ham Whisperer (for learning CW)

Trying to learn CW?  I have found a teacher online that so far has really helped me. The website is http://www.hamwhisperer.com/p/morse-code-course.html  Andy, KE4GKP, has eleven youtube (you can get to the videos through the website, or search for “Ham Whisperer” from within YouTube) based audio courses that present the letters, numbers, and prosigns.  Most lessons present three letters and a number.  He presents a letter and repeats it many times as you write it down, after that letter he will send three words for you to copy and give the answers after, he will then give a random run with all the letters and numbers you should know at this point with the new letter included.  He will then present the next letter, and repeat all the steps.  At the end of the lesson, he presents a longer random run, with everything you should know at this point, the key to this run is on the webpage for that lesson.  At the start of the new lesson, he reviews the last lesson with a random run of those characters, and begins to present the new items. For me, this is really helping, so I wanted to pass it along.  Once I get to a higher level of recognition, I will then include tools to simulate HF noise, fading, other signals, etc…..oh and actually listen on the radio!  But these lessons have gotten me farther than I have been able to stick with the code than ever before……. Also here is a link to the K7QO code course that has audio files and key that starts with letters, numbers, prosigns, words…..eventually getting to entire sections from various books.  This is a program that was being given away by The Fists CW Club of North America at the Dayton Hamfest. http://www.k7qo.net/
-Scott Gray, KD4VVC


Build an APRS IGate

Why build an IGate? There are two fundamental parts of the APRS network that enable communications beyond simple peer-to-peer transmissions. They are Digipeaters and IGates.

Digipeaters are just like normal voice repeaters in that when they hear traffic, they rebroadcast it with a little more antenna height and usually a little more power. Thus, they increase the range of the original transmission. Unlike a voice repeater, though, APRS Digipeaters receive and send on the same frequency (144.39 in North America). As a result, too many Digipeaters, too close together can be an issue. This one frequency would quickly reach saturation if everyone setup digipeaters at their homes. For that reason, it’s best to consult APRS Elmers in your area to confirm that there is a gap in coverage before digipeating.

IGates, on the other hand, are a different story. When an IGate, or Internet Gateway, hears traffic, it sends that data to the APRS-IS (Automatic Packet Reporting System – Internet Service). APRS-IS is a live stream of APRS traffic worldwide. Without APRS-IS, websites like APRS.fi would not be possible. Setting up an IGate is an easy way to contribute to the strength and utility of the APRS network without overwhelming the RF side of things. Thanks to IGates, the following features of APRS are possible:

1.Families can check in on the progress of loved ones who are driving long distances and well beyond radio range.

2. Travelers can check for repeater and net info for a city they plan on visiting in the future.

3. APRS users can troubleshoot their equipment and identify coverage gaps in their area.

4. APRS users can send short emails from their radios or send/receive text messages from well outside of normal RF range.


What you’ll need to get started.

1. A radio with a power supply. This could be a mobile or base station radio hooked to a power supply or it could be as simple as a HT left in its charging cradle.

2. A good VHF antenna as high as you can get it.

3. Coax cable.

4. A Terminal Node Controller. I’ll be using the Mobilinkd Bluetooth TNC. This project could also be accomplished using the audio cable detailed in the “Hardwire Cell” project provided that the user employed a virtual TNC like Dire Wolf to encode/decode packets. If you want to go receive only on your IGate, you can go even more simply with a basic audio stereo cable from your radio’s external speaker output to the mic input on your computer. I’m using Mobilinkd so my computer and radio do not have to be co-located.

5. A computer and APRS software. For my IGate, I’m using a laptop that’s nearly 10 years old and was otherwise collecting dust on a shelf. For software, I recommend APRSISCE/32. To work with the Mobilinkd TNC, the computer has to have Bluetooth. If the computer you want to use is lacking this feature, Bluetooth USB adapters are as cheap as $12 on Amazon. This computer will also need always on internet access. If you don’t have a computer to spare or you want to go with a low current option, I can recommend Raspberry Pi as an IGate platform.


Step One – Setup the Radio

1. Install your antenna and run the coax to your radio.

2. Power up the radio and tune it to 144.39 if you’re in North America. If you find yourself elsewhere in the world, check APRS.org for the correct frequency.

3. Connect the Mobilinkd Bluetooth TNC to your radio and turn it on.

4. On an Android tablet or smartphone, download the Mobilinkd configuration tool from Mobilinkd.com. Note: If you don’t have an Android device, you can skip this item and move to the configuration of APRSISCE/32. You’ll need to adjust the volume for optimal reception through trail and error.

5. Pair the Mobilinkd TNC to your device. The password is 1234.

6. Run the Mobilinkd configuration utility. Click connect. The tablet or smartphone and the TNC should now be connected.

7. Wait for an APRS packet to be received by your radio and watch the sound input level in the configuration utility. If the sound meter registers too weak or too strong, adjust the volume on your radio accordingly. Once you’re satisfied that the levels are good, click disconnect on the configuration utility and close the program out. You can also upair the TNC from your mobile device.


Step Two – Install and Configure APRSISCE/32

APRSISCE/32 can be downloaded for free to a Windows computer at http://aprsisce.wikidot.com/. There are similar programs for all the operating systems, so let Google be your guide if you don’t have a Windows box.

1. Create a folder for the program on your computer and unzip your download to this destination. There is no installer, so once unzipped, you’ll simply run the EXE. Client configuration will come up first.

2. Client configuration

a. Type in your callsign and APRS-IS passcode. The callsign is your amateur radio callsign. The SSID is an additional identifier that helps differentiate different stations that you may own. For example, your IGate versus your mobile rig. You’ll want to have no SSID if this is your primary fixed station and you are able to receive messages at it. If this IGate will be at a remote site, headless (no monitor on the computer), or otherwise unattended, use a -10 to identify it as a simple IGate. The APRS-IS passcode is a hash code generated against your callsign. This is a minimal barrier to entry to APRS-IS to help ensure only licensed Amateurs are using the system. If you don’t have a passcode from using another APRS product, email aprsisce-owner@yahoogroups.com. The contents of the message should include your name, callsign, and the fact that you need a passcode for APRSISCE/32. Note: While you’re waiting on your passcode, you can still continue on. You can send and receive packets on the RF side without it. The passcode is only for IS traffic.

b. Change your icon. To let others know that you are an IGate, you should adopt a black diamond. The overlay will vary. The letter “I” was the standard and is still very common. However, Bob Bruninga, the creator of APRS, has asked for more specificity. Overlay a “R” for receive only (more on that in a bit), a “T” for a station that will transmit one hop, or a “2” for a station that will transmit two hops (less common).

c. Your declared range will be based on your wattage, antenna height, antenna type, and a few other factors. Enter your best approximation here. Since this is measured in 1/10 mile increments, 50 would equal 5 miles.

d. In comments you should enter a way that people can contact you if they need to. If this were a mobile station, you’d enter in the voice frequency that you’re monitoring. However, for a base station, this should probably be an email address.

e. All other defaults are OK for now.

3. Set your location. The nice thing about a base station is that you don’t need a GPS. Manual entry works fine. Now that you’re done with client configuration, you see a map of the world. Pan and zoom until the crosshairs are on your location. If you want to change the contrast on the mapset, move the arrows on your keyboard left or right. Once you’re satisfied that the crosshairs are in the ballpark of your base station, right click the map. The last field in the menu that appears will be a lat/long. Mouse over this location and select “Move ME HERE.” Congratulations, you are now a really oversized GPS.

4. Now we need to add the Mobilinkd as a TNC. Go to Configure / Ports / New Port. This will bring up a new window called New RFPort. Select Simply(KISS) for the TNC type and give the device a name. I recommend calling it Mobilinkd. Next, the system will ask you what the port type is. Select Bluetooth. In the next Bluetooth Configuration window, select the Mobilinkd from the drop down and hit OK. Note: If you haven’t already paired your computer with the Mobilinkd, it won’t show up as an option in this drop down.

5. You have some choices to make at this point. Do you want your IGate to receive packets only or do you want to make it capable of sending in addition to receiving? If the former, your IGate will not show up on the RF side. However, it will show up on the IS side and will, more importantly, pass packets over to the IS side when they are received. If that’s what you want, select RF to IS, Enabled, Bulletin/Obj, and Messages. All the other defaults are fine. If you want the latter, your IGate will make its presence known periodically via RF. More importantly, if someone tries to text a mobile user that’s within your range but not within originator’s range, your IGate will relay the message to the user. For this scenario, select IS to RF, Xmit Enable, and Beacon, in addition to the options listed above.

6. Under Enables, select APRS-IS Enabled, Beaconing Enabled, Internet Access, and OSM Fetch Enabled (this allows you to pull down Offline Street Maps). Under Enable / Ports, make sure the Mobilinkd is selected.

7. Under View, select all. To test the effectiveness of your IGate, you’ll periodically want to pop in here and select RF only to see how effective your radio reception is. With APRS-IS on, your station will look really active. Drop it from the screen temporarily and you’ll see how you’re really doing on the RF side of the equation.

8. Under Configure / Map, uncheck Purger Enabled. Each time you zoom in, the corresponding map tiles are downloaded. Unchecking this option keeps those tiles on your computer which will be helpful for loading speed and the resilience of your setup when the internet goes down. Additionally, you must open Configure / Map / Tile Sets / Original and uncheck Purger Enabled and increase the number of days that map tiles are retained to ensure that tiles are maintained long term. As an emergency focused organization, we want these maps saved so we can continue to support APRS operations if we need to break ties with the internet. See the notes at the end of this article for instructions on downloading or “prefetching” map tiles when you’re done setting up your station.

9. Under Configure / Status, change your intervals to 20 minutes or higher. Mine is sent to 30. If you’re at a fixed site, we don’t need frequent updates. The exception here would be a weather station. Even if you’re only sending info to the IS side, you should still follow the guidelines set for RF traffic. Though not as easily saturated as 144.39, the IS side should not be needlessly cluttered. It’s run and maintained by volunteers and should be used wisely.


Step Three – Monitor

Your station should be up and running now. Periodically, you’ll want to check on your station to make sure it’s working properly. One way is to check APRS.fi for statistics. To do this, type your station’s callsign into the Track Callsign box. If your station has successfully relayed a packet to the IS, it will come back in the search and a bubble will show up over the station’s location. Select info from the top of this bubble. This will pull up a page that will let you know how many packets have been received, who the packets were originally from, and will show you a graphical representation of your coverage area superimposed on a Google Map. On that last one, keep in mind that what you’re seeing is not the same thing as a RF propagation study. If nobody ever sends a packet from a position, let’s say, south of you, the area to the south of your map will have no colored blocks in it. This may mean that you have poor coverage of that area, but it can also mean that no one is running APRS there, too. Also, do note that APRS.fi will display this coverage map by months. So, if it’s currently the first of the month, you’re going to receive very little from this map unless you roll the map back to a month where you were operating for more than a few days, depending on local traffic.

5 Days of IGate Coverage

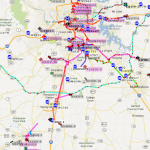
Above is an example of just five days of traffic received by my current IGate, a HT in a second floor window south of Franklin. The more red a box is, the more packets were received from that area. 436 packets were ported over to the IS side during the five days depicted on this graphic, mostly from vehicles traveling the I-65 corridor to and from Nashville.

Getting Oriented to APRSISCE/32

APRSISCE32 Screen Shot

So now that you’re up and running, here’s a basic primer on what you’re looking at…

1. Scroller – This is a list of all the stations that you’ve heard from with the newest at the bottom. If you want to see how a particular packet got to you, click on the callsign in the scroller and the path will appear. As a side note, you can also turn on path visualizations in APRSISCE/32 so you can see on the map the path a packet took to reach you. I love that feature.

2. Message Notifier – When you have a message, the callsign of the sender will show up here. Click the callsign to read the message and respond.

3. Zoom Bar

4. Range Circle

5. Range Value

6. Battery Status

7. Station Count

You may be wondering what the green box is in the bottom left hand corner of the screen. It’s a National Weather Service flood warning that was in effect at the time the screen capture was taken.

APRSISCE/32 is an extremely feature rich program and to describe all the options would take too long for this article. Explore. You have the basics to get started. For additional instructions on using APRSISCE/32, you can go to http://aprsisce.wikidot.com/.

As a final note on APRSISCE/32, here is how you can automatically download all the tiles two levels of zoom deep within your current range circle. I mention this because it is key to using your computer for APRS support when the internet is not available. Hit Configure / Map / Prefetch. When asked if you really want to download that many tiles, select yes. Now leave your computer alone for a while. If you move your screen before all has been downloaded, the download will stop. The yellow circle expanding from the center of your screen is marking your progress during the download. Once complete, those map tiles are saved on your hard drive.

This article was written June 5, 2014. If you have questions or comments, I can be reached at my callsign at arrl.org.

Dallas Clements

K7DCC

To see more APRS projects, return to our main APRS page here.

APRS is a registered trademark of Bob Bruninga.


The WCARES Antenna Team

Please sign in as a WCARES Member to view the content of this post.

Auxiliary Communicators of Tennessee – on Facebook

There is a Facebook page called “Auxiliary Communicators of Tennessee.”  It is a closed group in the sense that you must be a licensed ham radio operator to join.  Many thanks to Elizabeth St. Vincent (K4KTG) for organizing it.  It is a great place to share information of interest to all Middle Tennessee hams interested in emergency communications.


Global Eavesdroppers

http://www.providencejournal.com/article/20150808/NEWS/150809367:
In World War II, dozens of radio operators in Scituate dialed into enemy conversations worldwide.